25/06/2018

How I Edit My Blog & Instagram Pictures

How I Edit My Blog & Instagram Pictures
The photography part is definitely my absolute favourite part in the progress of creating new content for my blog. Even though it can get quite frustrating sometimes I also find it soo satisfying when the outcome is just as I imagined it to look!
Of course editing the pictures plays a huge part in the whole process and it actually took me quite a while to find a program/app that works well for me and offers all the tool that I need to edit my pictures in the style I want.
The problem in this whole thing was that most bloggers that I follow use Lightroom to edit their pictures and as I was not willing to pay for it, I had to keep searching for a similar one, and I think I have finally found a website that works just perfectly for me!
How I Edit My Blog & Instagram Pictures

BeFunky

I´ve tried myself through a whole lot of different free editing programs and the one that I always went back to and been using since easily a year or more now is BeFunky.
I´ve always found it hard to control how much of an effect you want to have on your pictures or it was really hard to keep your pictures looking natural and not overly done. Like for example you want to make your pictures brighter, and some programs just add that very weird looking grey film over it, and stuff like that was soo frustrating to me, haha.
With BeFunky I don´t have any of these problems. It took me a while to find a good selection of tools to make my pictures look the way they do now and I also think that I´ve finally mastered to figure out how much I need of each tool to make my pictures look how I like (actually really adore) them!
The tools that I use are...

Sharpening Tool - Even though I already get quite sharp pictures with my camera alone, I like to add some more sharpness manually to make them like crispy sharp haha. When you click on this tool it automatically adds 20% sharpness which I find is totally enough, sometimes I go up to 30% but never more than that
Color - I´ve only recently discovered this tool and it literally has changed my picture game to the better - like I swear it´s my life saver sometimes. As you can tell by its name, this tool will help you with the colours of your photos. I like to up Saturation to about 7. Saturation will make the colours in your picture more intensive which is just amazing if I have to brighten my pictures up a lot, that way I can kinda even it out a bit. Then I also really like to use Temperature. Before I used it to make my photos look basically white but now I like to use it to add a bit of warmth to it. I vary between 1-3 which works really well for my style.
Exposure - And lastly I add the finishing touches by turning up the Brightness to 10-20 depending on the brightness of my picture. Then add Contrast to 15, not sure of the affect of it but I guess it also makes my pictures a bit more intense. If the brightness has made my pictures not bright enough yet I add a bit of the Highlights - but only really about up to 5 as with this one you can really make your pictures totally unnatural.

Here you can see the before and after of the picture to this post - where I used all of the tools above:
BeFunky

SnapSeed

Now we come to what I use to edit my Instagram picture. I had this app on my phone for ages before actually getting into it and understanding how to use it. Inthefrow´s pictures got me motivated and excited to use this app more frequently and properly - cause let´s be her instagram feed is absolute goals. I love this app to bits as it´s just super easy, has sooooo many tools and options that you can play around with. I recently found myself just uploading random pictures to it and playing around with different editing styles and the results are literally out of this world!
Snapseed
Here you can see what I mean, just look how intense the colours got and how sharp and good the quality is. Just for your information, I took this picture with my phone through a quite dirty window of one of these sightseeing buses. I don´t think you would expect that after I´m done with editing.

I use the following tools...

Tune - It´s the one on the upper left corner on the tool page and there you can adjust things like brightness, contrast, saturation, ambiance, temperature, etc.. How much I use of each of these things always varies on the quality of the picture. I always try around and see how I like it the most.
Details - Here I adjust the Structure to about 20 and the Sharpness to 15, it still looks very natural then but you get a clear and sharp image
Spot Repair - I love this tool! If you have a blemish or you didn´t notice your photo background was dirty you can just paint over it with this tool and it will dissapear perfectly. Again it´s something you have to play around with to get the hang of it, but once you do, you´ll love it! 

What do you use to edit your pictures?

BLOGLOVIN | INSTAGRAM | TWITTER | PINTEREST

SHARE:

05/06/2018

Coach Fragrances - Classic & Floral

Coach Fragrance
Coach Fragrance
Who doesn´t love a heavenly smelling, unique fragrance? I definitely do and am always on the hunt for a new one I can keep sniffing, recommend to my friends and family and overall just make it my very own unique scent.
Well, I found exactly two fragrances from a brand that is quite new to the market of perfumes - Coach
You might know this brand more for their bags, or just generally their leather ware, but some time ago they launched fragrances - I can tell you one thing about them already, they are FAB!

The bottles resemble the typical design of their products, you get a really simple yet kinda classy and luxurious looking bottle - according to the motto less is more.
Formed into the glass is the Coach Logo, which I find looks really cool as you can see right away from which brand this perfume is, without it being too obvious and over the top.
Another thing that I found really cool, is that the sprayer looks exactly the same as the buckles of their bag, I really love how thoughtful and detailed even the bottles were designed.

I first got introduced to their perfumes at a Blogger event last year, and since then I haven´t used any other perfume - even though I did and still have some half used perfumes on my vanity...

Classic

"Inspired by the spontaneous energy and downtown style of New York City"
 Their first fragrance was inspired by NYC, where Coach was founded, and so is also kinda something really special for them, I believe.
With the ingredients of this scent they kinda tried to hold onto their main product range - leather.
So for the base scent they choose a suede musk, don´t think that this fragrance smells a lot like that though, it does have a really light leathery scent to it, but with the Turkish Rose and Raspberry that were also added, it has a really gorgeous scent - a bit fruity, a bit rosy and a bit of leather makes a really nice mixture. I find it really comfortable to wear, as it´s not a heavy scent that will be the only thing you smell for the whole day, but it´s more like something that fades away a bit but people around you will easily be able to smell it when you move around or pass by.
This fragrance is the first one I got compliments for, and jesus did I get a lot of compliments.
I first had the 30ml bottle, before I was kindly gifted the 90ml bottle, so I gave the smaller one to my mum and she wears it daily! Same as my sister who even already purchased this perfume already.
It´s definitely a big hit in our family!

All in one, this fragrance is a timeless scent, that you can either wear in the summer or in the winter, it just fits perfectly and gives you a really unique and lovely scent.

Coach Fragrance

Floral - their newest addition

Just recently they brought out the spring/summer edition fragrance and oh my god I love it!
I´m generally someone who likes sweet, feminine fragrances more than anything, and so this one was something I was really excited about as I already loved their classic fragrance so much.
I was absolutely not dissapointed!
This perfume is inspired by Coach´s signature Tea Rose collection (find here), starting from the packaging and the bottle tag with those cute little flowers on, which you can find on every single item of the said collection, to the absolute gorgeous flowery scent of this fragrance.
I find this is soo comfortable to wear, cause you know those perfumes, where you kinda always think it might smell too strong and just not nice to smell all day round - well this is definitely a scent that is easy to wear and actually stays on during the whole day!
Now that I´ve mentioned about a hundred times how good it smells, I´ll tell you what makes the perfume smells so good.
As a base they choose crystal musk, and on top sambac jasmine and pineapple sorbet.
I find it has a quite musky scent, yet is kinda sweet and fresh smelling and so is all in one a very chic and elegant feminine perfume.
I´ll surely wear it throughout the whole summer, as it just adds that special something to a cute summer outift and ambience.

Coach Fragrance
Most of the times when new perfumes are being released, there are also bodycare products coming with them - which I never really get around to trying, until now.
This shower gel was also gifted to me and it smells divine! Exactly like the their classic fragrance.
I don´t use it everyday, as I´d rather safe it for special occassions, haha.
It´s texture is not creamy at all but rather an actual gel, which has a very strong scent at first but once you wash it off again it becomes a lot lighter and so lovely! I actually doubt you´ll need to put on perfume after using this product in the shower.

Have you tried the Coach Fragrances before? What kind of perfume do you prefer to wear? Flowery, fruity or something more musky?

- This post contains PR samples -
SHARE:

25/05/2018

3 To Try: Eye Makeup

3 To Try: Eye Makeup
For someone who just can´t master a sharp contour - and probably never will - and also has quite thin lips, I like to concentrate more on my eyes when going for a full makeup look. Everything from brows, to eyeshadow, to lashes is something I´m willing to invest in cause I find it makes a huge difference to my whole appearance and honestly it´s just so much fun to get creative with different eyeshadows, trying to accomplish that perfect wing and make your lashes as long and fluttery as possible. I put together 4 products that I use on a daily basis and don´t ever stop using...

Model Co. Brow Pencil

My brows look already pretty okay without doing anything to them, but I still like to fill the few spare areas in, to perfect and sharpen them. For this I prefer a triangle shaped pencil like this one, over a powder or pomade by far! It is just the perfect shade for me, not overly pigmented but buildable - which I find is really important as sometimes I just want a soft brow look and sometimes I like to go full in and make them as sharp as possible - and because of the shape it takes me like a minute to fill my brows in. It´s a product you can take on the go with you, as on one side you get the product and on the other side a spoolie brush - all you need for a quick touch up.
3 To Try: Eye Makeup

Urban Decay Eye Primer Potion

Another "issue" that I have to deal with are overly oily lids.
It´s impossible for me to wear eyeshadow without any primer underneath, as after a while it´ll just crease away in the ugliest way possible, haha. So to prevent that I´ve been trying through some drugstore eyeprimers which never really did a perfect job. I decided to treat myself to the infamous Primer Potion from Urban Decay. It has been my favourite for a very long time now. It not only keeps my eyemakeup in place but also intensifiies the colours and when worn on it´s own, evens out the colours on my lids - cause I also got quite veiny eyelids haha.
What I also absolutely adore about it is, that the applicator is like a concealer applicator, so you can just swipe it all over your lid and blend it in with a beauty blender. Even though I have it since quite a long time now, I still have like half the tube left, so totally worth investing in if you have the same problems with keeping eyeshadow in place.

HD Eyeshadow Palette

My go-to everyday eyeshadow palette is this one. It´s got exactly the shades I like to wear on my eyes, earthy browns and champagne-y glittery shades.
The shades all have just the right amount of pigmentation, even the glittery shades comes off just as it is in the palette. The brush that comes with it is suprisingly also very good - on one side you got a quite stiff blending brush and on the other side you got a kinda liner brush that I like to use with the darkest shade on my lash line instead of actual eyeliner.
It´s definitely a palette you can wear all year round, the darker browns shades in the colder months and the rosé gold/champagne colour during the spring to add a hint of colour and sparkle.

What are your current favourite eyemakeup products?

BLOGLOVIN | INSTAGRAM | TWITTER | PINTEREST

SHARE:

24/05/2018

Affordable And Effective Skincare With Evoluderm


*this post contains PR samples
Evoluderm
If there´s anything I absolutely love to treat myself to it´s skincare - even more than makeup sometimes hehe. Simply for the reason that I find makeup can only achieve it´s full effect when you have a (nearly) flawless canvas to work with. For body care it´s nearly the same, but more for my own comfort. Now that the summer is coming closer I want to prepare my skin with enough hydration so that I get a nice and even tan, without having to worry that my skin flakes off immediately after.

Treating myself doesn´t mean that I only go for luxurious skincare though.
My collection consists of a good mixture between luxurious bits but also amazing products from the drugstore. So I was more than happy when Evoluderm approached me asking to test some of their products - *important note* at the end of the post there might be a chance for you to try my personal favourites from Evoluderm aswell! ;)

Evoluderm is a french brand that is focused on afforadable cosmetics. Their goal is to give every woman quality skincare with small prices while keeping a sensory aspect. With their huge range of products for face, body and hair, they definitely have something for everybody!
You can find all their products in TKMaxx so defintely keep an eye out next time your out shopping!

Eau Micellaire & Lotion Tonique // Micellar Water & Toner

This duo has been soo good for my skin!
Since getting this micellar water I´ve been using it to take off my makeup every single day. It takes my makeup off so fast and easy. Compared to the Garnier version this one from Evoluderm is so much better! Literally one swipe with a cotton pad soaked with this and my foundation is gone.
Barely any rubbing is needed and so my skin doesn´t get red patches nor does it feel tight and sting-y afterwards. On top of it, this stuff smells absolutely incredible. Really sweet like bubble gum, haha, 
I´m literally obsessed with the scent of it!

After I took my makeup off, it´s time to take the excess oil and dirt of my skin before I continue with my night cream. I´m usually not a big fan of toners as I find they are really drying and only cause my skin to get even more blemishes and all in one really bumpy and stingy.
This one is just as the micellar water especially made for sensitve skin, and so works very gentle.
One of the ingredients are roses, and that´s exactly what the product smells like. After wiping it all over my skin feels squeaky clean, super soft and just really lovely.
Both of these products together have helped my skin to clear up and get a lovely glow to it.

Masque Tissu Eclat // Sheet Mask

Who doesn´t love a good sheet mask? I certainly do!
They become more and more frequent in the drugstore now, all for different purposes, but honestly most of the times I can´t really feel a difference between them all.
This one though was really love - the moment I put it on it felt like a normal sheet mask but after a short time I could feel it soothing my skin. Like you know something is working on your skin when it starts to sting in the places where you got your blemishes and that´s exactly what this mask did.
It hydrated my face really well, but what I found was really good that there was just the right amount of product on the mask. After I removed it, there was still a bit of cream left that didn´t sunk in, but I could easily massage it in, without being left with a sticky film on my face.

Evoluderm

Gel Douche Exaltant in "Monoi" // Shower Gel "Monoi"

I´m not really picky when it comes to shower gel. I just always pick a random one up when I´m out shopping - normally the one that I last saw in a commercial, haha.
Well this "behaviour" will definitely stop from now on, as I have found my absolute dream shower gel - and I´m not even overreacting here. This one right here is the only shower gel I´m willing to use for a very long time. The reason for that is first, look at how huge the bottle is, this will certainly last me a good few weeks! Second, it´s soo hydrating and gentle. I always got red itchy patches on my skin, but it has stopped since I´ve been using this product in the shower. And third, it smells like beach holiday in a bottle. Really tropical, like the beach, suncream, heat, everything you relate to a nice summer holiday. It costs around 4€ in TKMaxx which is an amazing price.
Please - I beg you - smell it when you get the chance! I swear you will love it.

Argan Divin Soin Longueurs & Pointes // Argan Divin Haircare Cream

I have thick, wavy, frizzy hair, so I use heat about every third day to atleast try to tame my hair.
Even though I do use a heat protection, my hair feels quite dry after I´m done with the styling, and so I´ve been searching for a product that gives me exactly that needed hydration - I found exactly what 
I´ve been searching for in this tube.
It´s hard to see what the actual product looks like from my pictures - sorry for that - but it´s like a white cream. You only need a walnut size of it for the lengths and ends of your hair, which is totally enough. Simply rub it into your hair and it sinks in within seconds, like completely. I´m actually always very sceptical with creams like that as normally they leave a weird greasy feeling and look behind but this is really good. After about half an hour you get the full effect - soft and silky hair.
It definitely won´t leave my haircare routine for a very long time - such a good alternative to the Davines Oi Spray aswell.

Huile de Beauté // Body & Hair Oil

I´m soo unsure about this product.
Apparently it´s for dry skin, but it also says you can use it as hydration for dry hair - so that´s exactly where I use it first. I put a rather small amount into my hair, which was a really big mistake haha.
My hair looked absolutely horrible, like really greasy and really hard to style aswell.
So next thing I tried is use it as body oil which did work a bit better but it took ages until it sunk in and also didn´t quite smell that good...
I´ll keep testing and report back as soon as I know how to use it the right way, haha.

You can find all the products on their website: http://www.evoluderm.com/

Congratulations if you´ve lasted until the very end haha. Now we come to the part where you are able to test my favourite products from this pack - together with Evoluderm I´ll do my very first GIVEAWAY - eeeek I´m soo excited. I´ll do it over on my Instagram so definitely keep an eye out for it! Which products I´ll be giving is a little secret so contain your excitement until my giveaway goes live hahaha.
SHARE:

09/05/2018

Giving Your Phone A Spring Makeover With CaseApp

*this post contains PR sample
CaseApp
Now that I´ve updated my makeup collection to spring approved products, it´s now also time to update my "accessorizes" - aka my phone.

I´m not a girl who wears a lot of accessorizes or jewellery so I kinda have to use my phone or rather the phone cases that I put on my phone to add a little something to my every day looks.
I absolutely love buying phone cases, whether it´s really simple ones, seasonal ones - especially christmas phone cases! they can´t be cheesy enough, haha - or creating personal ones for either myself or my friends - it´s just a really cool and thoughtful gift.

If you are anything like me in this point - or simply just want to redecorate your phone - I think I have just the right shop for you....
CaseApp

CaseApp

CaseApp is an online shop that specifies on all things about smartphone, tablets and macbook cases and skins. They offer a huge selection of cases and skins for iPhones, Samsung Galaxy, iPods, iPads and Macbooks, so I´m pretty sure almost all of us will find something fitting for their device - they even offer their designs for iPhone 3 which is very suprising but also very cool, haha.

Now to the designs, their offer of different predesigned cases is just amazing and it was soo hard for me to decide on three phone cases. I definitely wanted some that not only look cute but also kinda fit into the colour scheme of my pictures so that I could also use them as blog props.
Scrolling through their designs I found varities of marble, flower, fruits, art-y, animals and many other designs.

They do not only offer pre designed cases though, you can also design your very own phone cases and skins for your devices - and also even for your phone holder, how exciting is that!
Creating them is literally so easy aswell, all you need to do is select your device, upload a picture of your choice - or even more pictures as it´s also possible to create collages - and if you want you can also add a texts, cliparts or a background to the design.

Definitely a lot of space to let all your creativity out and create something very special and unique!

Now that you´re done with designing, there´s one last step you can decide on, do you want your case to be matte or shiny? Haha.

The design gets printed onto the case so it has a really good quality, and I´m pretty sure the print won´t rub off my phone cases really soon - which is something that happens quite often with cheaper options. Especially in the summer months when I get sweaty or oily hands.

CaseApp offered me to select three phone cases, as I thought not only I should have the chance to give my phone a little makeover, I made my mum and sister select one for each of them aswell.
In the end I went for the phone case with little plants on them, I already got a lot of compliments for it and it will definitely appear in loads of future blog posts as it fits just perfectly with my theme! My mum went for the marble design with the pink corner, which I think is really cool, simple and yet has a kinda girly touch to it with the pink detail.
My sister went for the gold rosé kinda marble design. Again really cool and so unique, like I´ve never seen a phone case like that!

Do you want to get a phone case or skin yourself now?

I also got the chance to give a lovely discount of 20% on your order with the code LAURA2018
Apply it during checkout and save yourself some pennies ;)

You can find the shop this way: https://caseapp.de/

Please make sure to show me the phone cases you get or create by tagging me on the pictures of them on Instagram! I´m really curious to see what you all selected in the end :)

BLOGLOVIN | INSTAGRAM | TWITTER | PINTEREST

SHARE:

07/05/2018

The Spring Edit

The Spring Edit
Now that we have around 20 degree or hotter every day, it was definitely time to switch some of my everyday winter staples to something lighter, more glowy and fresher.
As much as I love to use a good bronzer, for spring I tend to use a nice pinky blush. I just love how it makes me look really fresh, healthy and so spring-y, haha.
Of course I´ve not only switched to blush but also made some changes in my base, lips and skincare picks....

Dr. Botanicals Moroccan Rose Superfood Facial Oil

Before I apply makeup I make sure my skin is hydrated and plump. On days where my skin doesn´t need an intensive moisturizer I like to reach for a facial oil like this one from Dr. Botanicals.
It´s not a thick heavy oil that sits on my face for a long time. It´s texture is more watery, and sinks in within seconds. My face not only feels really lovely afterwards, but also smells heavenly like roses - consider that when you have sensitive skin - and is left with a glowy sheen on it. I feel like this oil is more likely one of those dry oils, as unlike other facial oils, this one doesn´t leave a thin film or anything on my face so I can continue with my makeup routine right away.
The only thing on the minus side of this product is that I do need half of the pipette for my whole face and as the bottle itself is not that big, I did run out of it quite quick.
But as I already said I only use this when my skin is already in a good condition and for that it´s perfectly fine to treat yourself to!

Rimmel Wake Me Up Foundation + Catrice Galactic Highlighter Drops

I´ve seen lots of girls adding drops of highlighter into their foundation to make the finish of it more glowy and so I was on the hunt to find a highlighter that had a pipette so I could mix it easily into my foundation and so try it out myself. I went for the Galactic Drops from Catrice as I thought go big or go home and what could be more glowy than a galactic glow haha. It´s a white, quite glittery glow that I find is a bit too light when I wear it on its own, but mixed into my foundation it adds just the perfect amount of glow.
Speaking of foundation, my go-to is the Rimmel Wake Me Up Foundation. I already loved the Perfect Match Foundation a lot and since everyone recommened the Wake Me Up Foundation I just add to pick it up when I was in London. I can absolutely understand the love for this product! It feels really nice and light on my skin even though the coverage is quite strong. It´s the only foundation that I own that stays matte throughout the whole day.
Those two mixed together give me a really natural, glowy base!

The Spring Edit

NYX Worth The Hype Mascara

New Mascaras are always either hit or miss. I´m always searching for one that gives my lashes extra length but also a bit more volume. The main thing I´m concentrating on though is length and so when I saw this NYX Mascara all over my Instagram and absolutely loved the finishes of them!
Now that all 5 mascaras - yes I switched between 5 mascaras - ran out at once I knew now was finally the time I got to try it out. The name of the product speaks for itself - this mascara is so worth the hype! My lashes just look soo lovely, long and it also makes my eyes look so defined - love it!

PIXI Beauty Blush Duo in Peach Honey + HypoAllergenic Creamy Rouge Glow Stick

Now we´re finally coming to my favourite step in my makeup routine - blush!
I currently have two absolute favourites. The blush duo from PIXI combines a gorgeous champagne-y highlighter with a light pink blush. To apply that I like to use a big fluffy brush, swirl it over both powders and then put it on top of my cheekbones. It gives me an instant quite natural glow.
When I like to go for only a intensive pink blush though I switch to the blush stick from HypoAllergenic. You can see the colour of it in the swatch below - it´s a really stunning, kinda rose gold pink shade that gives me a really natural hint of colour.
When I apply it I like to draw crosses with it on the apples of my cheeks and up my cheekbones and then just blend it in with my beauty blender.
The texture of it is really creamy, the colour is definitely buildable - absolutely in love with it so I use it almost every single day!
The Spring Edit

PIXI LipLift Max in Honey Sheen + Manhattan Cosmetics Stay Matte Liquid Lip Colour in Rosefeller Center

As much as I love a berry lip, for spring I switch to rosy nude shades.
I recently found this Manhattan liquid lipstick and the colour Rosefeller Center is honestly one of the most gorgoeus shades in my whole collection. It´s like a deep pink shade, and has a kinda orange undertone which makes it look absolutely lovely on my lips! Even though it´s a matte liquid lipstick, it feels super comfortable and lightweight when it has dried down, kinda velvety - like I barely feel that I have it on, which I find really nice, haha.
I either wear it on its own or I add a sparkly lipgloss on top for a nice shine!
I don´t own a lot of lipglosses for some reason but honestly I´m perfectly fine with only using the LipLift Max from PIXI. Not only does it have a stunning honey colour but it also smells really minty.
The mint scent is also the reason why it actually gives your lips a little lift and make them look and feel plumper. It´s not sticky at all but still stays on my lips throughout the day.

What are your spring picks? Do you prefer a heavy or more natural makeup look?

BLOGLOVIN | INSTAGRAM | TWITTER | PINTEREST

SHARE:

23/04/2018

Creating A Productive Atmosphere

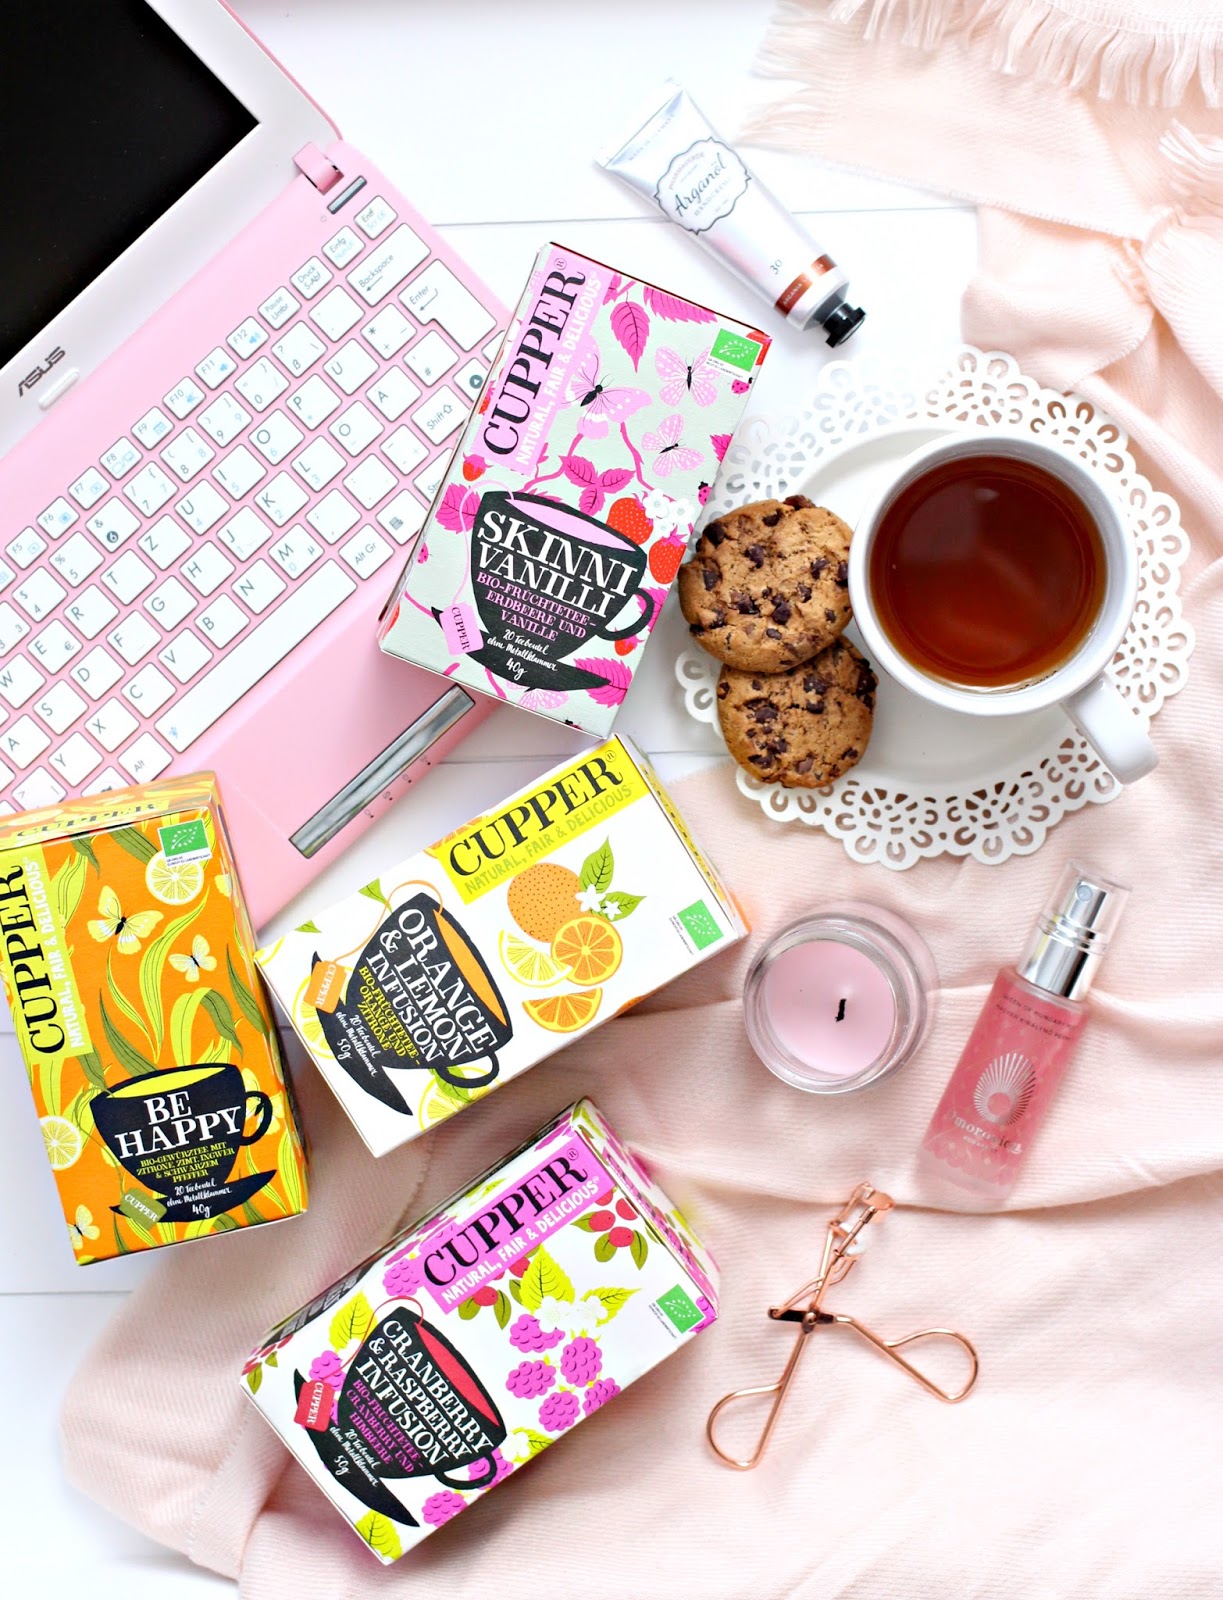
Cupper Teas
Cupper Teas
Creating good quality content not only needs a lot of inspiration and motivation but also an atmosphere where you can be productive and concentrate.
With atmosphere I don´t only mean your working place but also the things surrounding you.
When I´m writing up blog posts I often do that on my sofa or on my bed which works perfectly fine for me, the only things that keep disturbing me are little things like my phone, thirst, etc.

So, I got together with Cupper Tea to spill a few of my tips on how to create a productive atmosphere.

Shortly about the brand Cupper Teas, they are an original british tea company that was founded 1984 in Dorset - and are also UK´s first Fairtrade tea company.
What makes them so different from many other tea companies is that their tea bags are unbleached - unlike other bright white tea bags, their ones have a slight yellow-y shade to them, it doesn´t look disgusting though so don´t worry, I barely noticed the colour difference when I made my first cup.

As a tea lover, I think it´s really cool to find a tea company that not only pays attention to being fairtrade in their teas but also pays attention to little details as also being natural with their tea bags.

They sent me four packages of their tea to try, which leads me to my first tip for an productive atmosphere...

Enough Drinks & Snacks

I find myself being a lot easier able to concentrate when I´m hydrated, so before I start "working" I get myself something to drink. Water is definitely the healthiest option, but I like to go for something sweeter, like juices or during the colder months - a nice hot cup of tea.
Recently I quite enjoyed to make myself a cup of tea - preferably the Cranberry & Raspberry tea from Cupper Teas - and just let it cool off to get kind of an ice tea. Sooo refreshing and yummy!
Whatever you like to drink, make sure you have enough of it next to you - I find when I don´t have something to drink with me from the beginning I´m too lazy to get up after, haha.
Snacks are a nice addition as I sometimes just get random cravings that need to be taken care of, haha. Sometimes it´s sweets, or fruits or pastry, whatever it is I´ll most likely thank myself for thinking ahead haha.

Writing a To-Do List

I leave all the blog work until the weekend so as you can imagine there´s definitely a lot of things I have to get done when the time comes around - taking photos for several posts, for instagram, writing up posts, commenting on other blog posts, answering email, etc.
All of this can get quite overwhelming when I have to remember everything so to make things easier for myself I write up a to-do list. I just feel a lot more in peace and not as stressed when I can tick off things and also feel so happy when I can actually see what I got done that day.
I´d also like to start getting more into planners just to also be able to plan week aheads and so take the stress off worrying about not having any ideas for future blog posts

Tidy Space

When I find myself actually working at my desk I try to keep it as tidy as possible.
I absolutel hate it when my working space is full of papers and stuff as I can´t really concentrate since I keep being distracted by everything that lays around.
Of course you don´t have to put everything away from your table but you should clean it up to the point where you feel comfortable, have enough space to move around and the only thing you concentrate on is your computer. I just recently cleaned my desk at work and I felt immediately so much better and my mind wasn´t feeling as crowded as it was before.

Put Your Phone Out Of Reach

I left the most important point until the end. In order to actually get something done you have to put your phone away - atleast out of arm-reach.
Whenever I find myself back on my phone, scrolling through my Instagram feed for the hundredth time, I wonder how much I would have gotten done if I would not keep reaching for my phone.
It´s just so addictive to keep looking through social media and seeing what everyone else is up to - you might have heard of it but the Fear Of Missing Out is taking up so much of our daily life, it´s actually scary once you think more about it.
When I do put my phone away I find myself being so much more productive, so what I do to make sure I don´t actually miss out on any text messages or phone calls - as I find myself being distracted only by social media - is turn off the mute mode and put it anywhere where I could easily reach it when I get up. That way I can still check on it but don´t mindlessly reach for it and look through all the feeds.

Even though all these tips are sooo simple, I find they are the most effective.
We get distracted and overwhelmed with daily things soo easily, so it´s even more important to take over control of as much as you can and keep a clear head.

What are your tips for creating a productive atmosphere?

*this post contains PR samples

BLOGLOVIN | INSTAGRAM | TWITTER | PINTEREST

SHARE:

13/04/2018

The Evolution of False Lashes // Ardell Magnetic Lashes

*this post contains PR sample
Ardell Magnetic Lashes
Long, voluminous, thick lashes are every girls dream, right?
I find whether you´re wearing eyeshadow or not, having a pretty pair of lashes on literally transforms the whole look to a completely new level!

Sure you could just use your favourite mascara to make your lashes look fabulous, but most of the time you don´t achieve the same finish when some of your lashes have fallen out or are just not as long and thick as you wish them to be.

Same happened to me. I do have quite long lashes - thanks to Revitalash - but sometimes I just have spare spaces that I wish would just dissapear.
After watching loads and loads of makeup tutorials, I thought I´d give false lashes a try myself.
The girls in the videos made the application always look soo easy but unfortunately I was struggling soo hard with them, and gave up on using false lashes shortly after... until NOW!

Ardell is using a new technology for their newest false lashes line - Magnetism.
They use really small - nearly invisible after appliying - magnet bullets. Together with all natural human hair as lashes, it will be hard to notice if you are blessed with these gorgeous lashes, or if you had a little help to look even more fab ;)

I got the chance to try the Magnetic Lashes out myself before they hit the shelves in - mark your calendar - May 2018!! 
So not long to go now, yaaay.

Ardell kindly sent me the pair "110 Double", which I find is the more natural version of their original Demi Wispies.
Included in a package are four lash strips which make up to 2 pair of lashes - you got two upper strips and two under strips. All four of the strips are pre-curved to make it a lot easier for you to fit them on your eyes.

Well now we come to the exciting part of this new release, as the name already says this new lashes line is simply applicated with magnets. So you no longer have to deal with buying new lash glue, getting the right amount on the lash strip, no more waiting until it´s dry, etc. all you do is stick both lashes together and off you go - sounds lovely right?
As you cann see every lash strip has a few magnet bullets attached to it.
I was at first a bit worried whether these magnets were strong enough to really stick together, if you can feel the magnets, also if they would kinda break my lashes while being they "stuck" between two magnets and most importantly if they keep the lashes in place throughout the day/night.
After putting them on for the first time though, I was positively suprised by how strong they stick together, yet feel totally comfortable. They don´t budge at all, I tried slightly pulling on them and they did move a bit but from themselve they don´t move at all!

Speaking of my first application, it was again a bit tricky to put them on, but a whole lot easier then normal falsies with a glue. Simply because if, e.g. they´re not close enough to your lash line you can just try again and again. With the glue I always got it stuck on my lashes and lid and messed my whole eyemakeup up - please tell me this has not only happened to me haha.
I did have to try around a bit until I found a way of applying them that was easy for me, but eventually I got the hang of it and loved them finish.
It´s not really visible that you kinda have two lash strips on one eye and also they feel just as lightweight as the normal falsies.

Application

To apply them the right way, you first apply a coat of mascara to your lashes.
Then you take a tweezer - preferably the Ardell Dual Lash Applicator - and hold the upper lash strip in place on top of your lashes as close to your lash line as possible.
Then you take the under lash strip and move it towards the other strip so that your actual lashes are right between them. 
And Ta-Daa you´re done and good to go.

Be careful when you want to take them off though as to not pull out your own lashes...
I always grip them between two fingers and move them in different direction as to push the magnets apart. For storing you just put them back into their box and press the sides onto the sticky patches.
Just to make sure you have a curved lash strip for the next application.

When you´re planning to try them out yourself, take care of what size you pick as there are two.
The bigger size has 4 magnet bullets and the smaller size has only 3 bullets.
You´re not able to trim so you might want to decided on the size before buying them haha.
I got the smaller size with 3 bullets and they fit perfectly - I always had to cut off a good amount off the Demi Wispies.

They´ll cost around 14,99€ - sounds a bit expensive but you have to keep in mind that you can reuse them really often, so definitely worth the investion.

Of course Ardell doesn´t only offer the 110´s but there will be also Double Wispies, Double Demi Wispies, Accents 001 & 002. So there´s definitely a pair for everyone.
I feel like the Accents could be really interesting to try next for me!

End of the story is that I feel like this is one of the best beauty inventions ever!
It´s a great product whether for falsie beginners as you´ve got loads of trys without destroying them, but also for pros as it´s a fun thing to try out and might save you a lot of time during styling.

Have a look at all the Magnetic Lashes - here

BLOGLOVIN | INSTAGRAM | TWITTER | PINTEREST

SHARE:

30/03/2018

City Break Makeup & Skincare Bag

City Break Makeup & Skincare Bag
I absolutely love city breaks, discovering cities, doing some typical tourist stuff, eating new food, etc. just everything about a small getaway is total up my street.
This time I´m traveling to London (again) and I´m super excited. I just love this city so much and now that more and more bloggers share their favourite photo spots I, of course can´t help it and plan some of those spots into my schedule aswell.
To prepare my skin and look flawless for that upcoming shooting I tried to narrow down my collection to the best and long lasting products....

Makeup

My base needs to stay in place even better than on any other days, as we´ll be on the go all day and we´ll take lots of pictures and so I want to feel as comfortable and confident in my look as possible. For primer I´m taking the ThisWorks In Transit Camera Close-Up Primer with me, it gets quite sticky when it has sunk in, but doesn´t really have a thick consistency, so I won´t be getting the problems of getting blemishes cause my pores are blocked - happens too quick sometimes, haha.
I love glowy skin, especially the difference it makes on pictures. Right now I really like using the
L´Oreal Perfect Match Foundation, it has a medium coverage, is still really lightweight and blends in beautifully with a beauty blender. I hate to say it, but you get that "my skin but better" effect when blending this foundation in with a beauty blender. To brighten the area under my eyes I´ll take the Maybelline Fit Me Concealer with me. Not only does it sit really well and looks really natural when it´s blended in, but it´s also nearly empty so I might replace it while going shopping haha. To set everything I´ll use my MAC Mineralize Skinfinish Powder, I´ve recently rediscovered it and absolutely love using it now. It gives that flawless, even finish that I absolutely adore. Seriously after gently pressing it on - instead of swiping it all over - I can´t see a single pore or blemish.

I don´t do much for my brows lately, I´m glad when they look full and kind of in a good shape, so the easiest and quickest way to fill in my brows is by using the Smashbox BrowTech To-Go. I´ve been using it for such a long time now, already repurchased it and I´m pretty sure it wasn´t the last time. Because of it´s triangle shape and waxy highly pigmented consistency, it makes it really easy to get your brows in a good shape and evenly filled in. The gel that is also included on the other side of the pen is amazing. It keeps my brow hair in place but doesn´t make them feel stiff.
The only thing that is missing now are my lashes. My talented self has used every sample of mascars that I owned, up so now I´m left to use one of my older, nearly empty mascaras. Atleast one of my absolute favourites for long lashes is still half way full. The L´Oreal Telescopic Mascara is amazing for getting the long lashes effect. It´s super simple to use, holds a curl wonderfully and leaves my lashes still feeling soft and lightweight - I absolutely hate those mascaras that makes lashes feel really hard and as if they would break any minute...

Finishing off the whole look I put a bit of highlighter on. I haven´t been a big fan of cream highlighter before, but since trying the Sleek Strobe Dome I love the wet highlighter look it can give you. I always do three swipes with it and then blend it in with my Real Techniques Buffing Brush.

For lips I decided on a really simple, rosy liquid lipstick. The Manhattan Stay Matte Liquid Lipstick in Rosefeller Center is that kind of "my lips but better shade" - oh well now I´ve used this phrase twice already... - even though it´s matte, it feels really comfortable and not dry at all.
The lasting power though, is absolutely amazing! It stays on no matter what I do, so perfect for a day out and about.

That´s it for my makeup. I don´t take a lot with me, as I know myself pretty well and will most likely purchase some new makeup bits and bobs...
City Break Makeup & Skincare Bag

Skincare

Deciding on skincare to take with me is even harder than deciding on makeup products.
Simply because - please tell me I´m not the only one - I feel like exactly in these few days I´m away I might feel the need to use products that I haven´t used in months. Products like overnight masks, facial oils, etc. I try to go through my daily skincare routine in my head and so only pack the products that I use everyday. I still feel like it´s quite a big selection but I really need all of it - I swear.
Starting by removing my makeup, I fill my favourite Garnier Micellar Water, into a little bottle so that it fits into the max. of 100ml that I´m allowed to take with me - this is honestly the part that makes packing so much harder than it already is, haha.
Now that my face is bare I apply a good amount of the First Aid Beauty Ultra Repair Cream. This moisturizer is a total bargain with 10 pounds for a tube that has lasted me a good 4 months now. It´s extremely thick, yet sinks in fast and pretty much smells like nothing. Probably the reason why it has cleared and still keeps my skin lovely clear. On top of this night cream I put my eye cream, the Clinique Pep Start Eyecream. I´ve put a full review here which you can check out after reading this post ;) No but honestly, it´s a gel textured cream, it feels very fresh and I find it has evened out the skin tone of my under eye area and kinda made it look healthly plump and so I look more awake.
The last step I do before going to sleep is applying the Revitalash Eyelash Conditioner, if you want long, darker, fluttery lashes, you should definitely invest in it! I had really short, barely visible lashes before using it and now after applying mascara, my lashes go up to my brow bone and stay curled - without using a lash curler before. That´s it with my night skincare products.
In the morning I only use the Clinique Moisture Surge. It´s a fab moisturizer! Even though it´s gel-based, it still feels quite thick but sinks in incredibly fast, is really hydrating and blurs my skin out especially the area where my pores are the biggest.

What are your travel makeup and skincare essentials?

SHARE:

28/03/2018

Review // WhiteWashLab Nano Intensive Whitening Strips

*this post contains PR sample
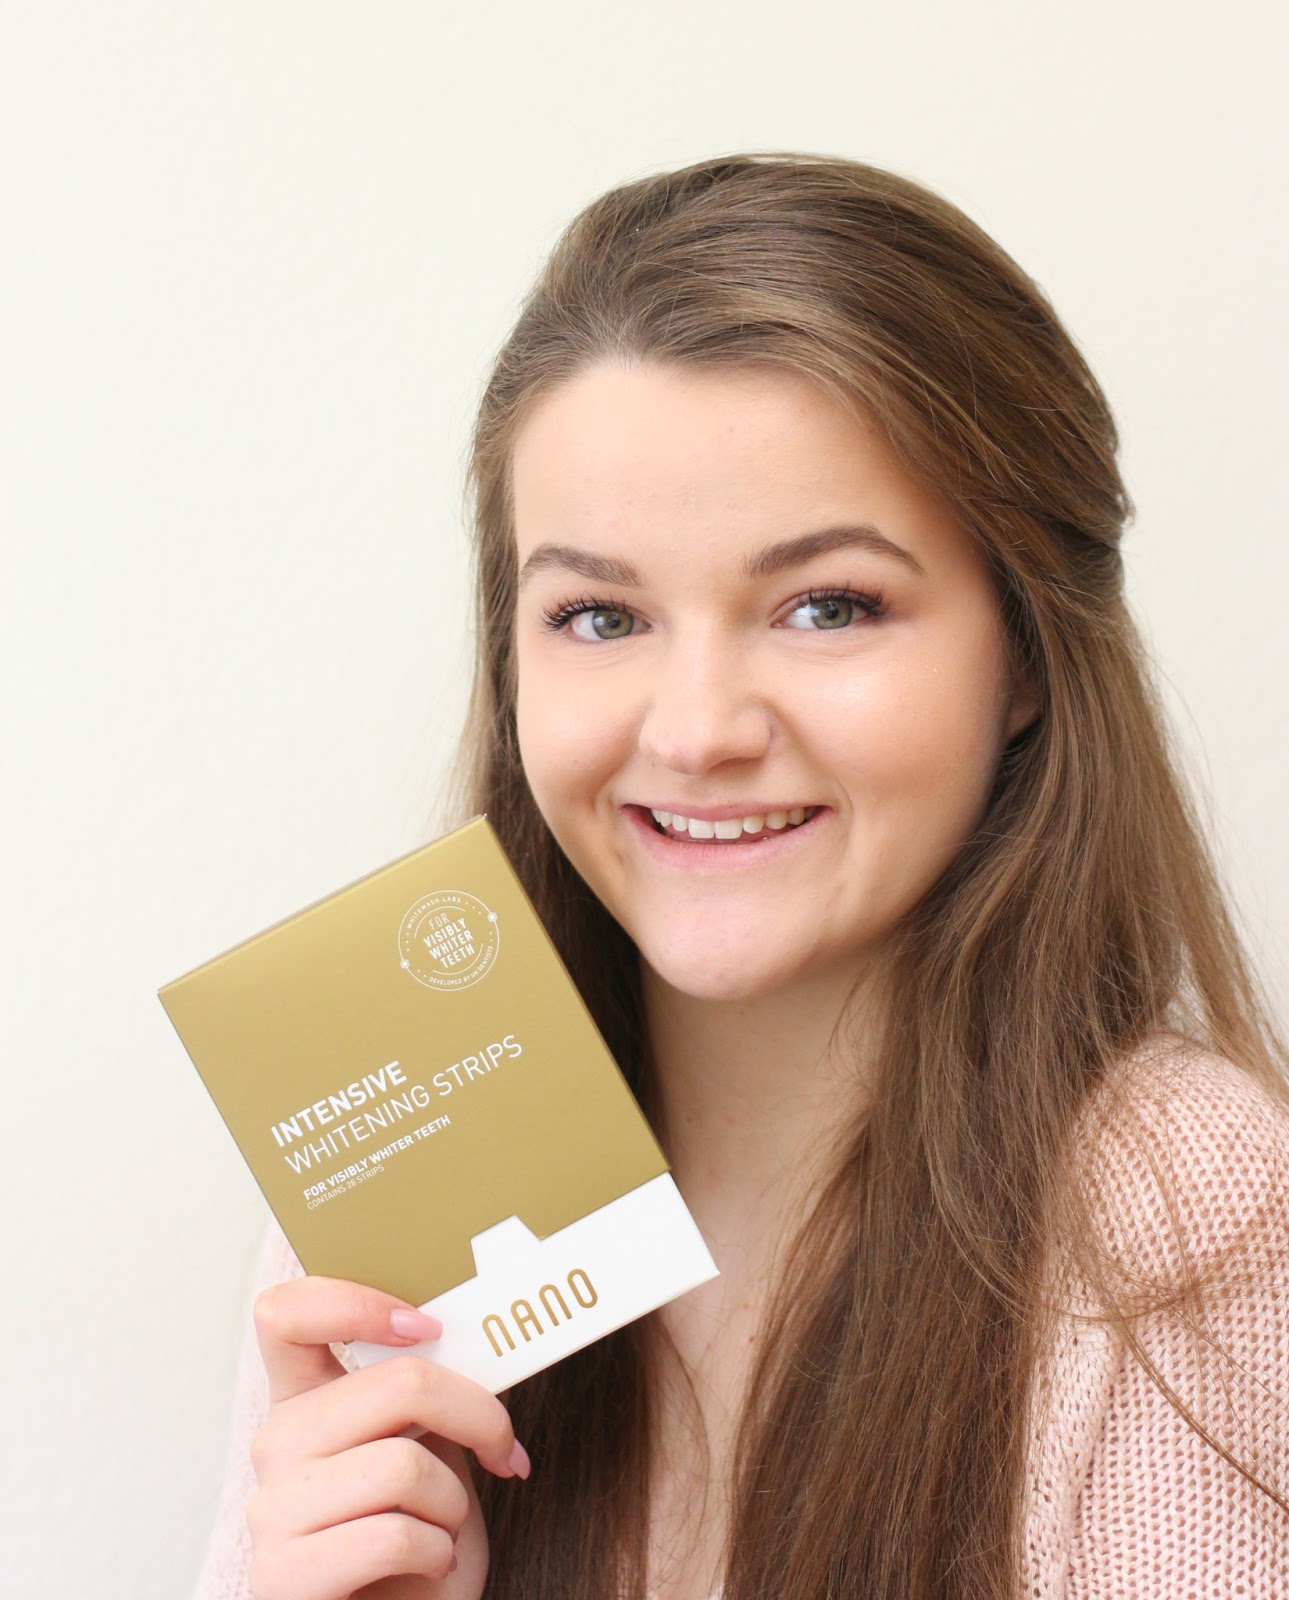
WhiteWashLab Nano Intensive Whitening Strips

Whitening your teeth in the comfort of your own home, sounds good? Then I think I have the perfect product for you

So some time ago I was kindly sent this Intensive Whitening Strips Kit from White Wash Laboratories Nano. As I was always debating whether it´s worth to get my teeth bleached and not being sure if it would look strange and unnatural, I was very excited to try these strips as they promised to give me naturally white teeth in a matter of two weeks.

This kit contains 14 packs with 2 strips per pack - so 28 strips in total. I sadly forgot to take pictures of the actual strips so sorry for that, but they are simply clear gummy strips stick to a little plastic square. The side of the strips that is attached to the plastic thing contains the gel that will whiten your teeth. All you do then, is pull the longer strip of and put it onto your upper teeth row, the shorter strip is then for your lower teeth.

They are meant to have a mint flavour but I found they had a really weird taste to them.
Kinda hard to describe, as it wasn´t really a plastic taste but just weird, after getting the gel on my tongue accidentally - don´t ask me how I managed to do that - I was trying really hard as to not make that happen again. Bu don´t worry about having this weird taste in your mouth for the whole hour, I really only tasted it when I got it on my tongue, other than that it´s really comfortable to wear and didn´t cause any discomfort or has given me the thought of having to remove it immediately.

WhiteWashLab Nano Intensive Whitening Strips
So after getting over the taste trouble, I put the strips on and put my timer on for an hour.
Most of the times I tried to use this as late as possible as you shouldn´t drink or eat anything while using them - you couldn´t drink anything with them in even if you really wanted to, haha, so I put them on at like 10pm and after removing the strips I went straight to bed.

I sadly have to say that I did have trouble with putting them on sometimes. As I found when my teeth were wet, the strips just didn´t want to stay in place, especially not the stripe on my lower teeth. 
It sometimes moved around a bit, but I figured out that it´s better to put them on after swallowing and drying of my fingers - just a little tip from my experience here to save you nerves haha.

Speaking of removing the strips, after wearing them for an hour they stuck really strongly on my teeth. I found I had to get a tight grip on them to be able to remove them. I flossed the leftovers of the gel with water and my toothbrush. They kinda felt even cleaner, than after brushing them.

WhiteWashLab Nano Intensive Whitening Strips
Together with the stripes I was also kindly sent this three pack of products that should be used together with the strips in order to really get the full effect.

It contains a toothpaste, a mouth wash and floss.
The toothpaste had a different consistency to the normal toothpaste you get at any drugstore. It was a lot creamier, was very minty and kinda gave me an even fresher and cleaner feeling than an "average" toothpaste. The mouthwash had a very similar taste and effect than the toothpaste and the floss is really awesome. That´s a weird thing to say but up to now I still use it everyday as I find it cleans the space between my teeth a lot better and more gentle than a normal floss. 
Why? Well it´s kinda wider and so you really get everything out.

After the two weeks were over I did notice a difference - which was a positive suprise as even though it did sounded very promising, I was sceptical if it would really give me a visible result.
To be honest even after a few days I could already see a really small difference but after the two weeks I was very happy with how my teeth looked. 
Before they were kinda stained - you know from drinking tea, coffee, etc. - and after they were just brighter. I´m sooo happy with this product and since you can use it so easily and comfortable at home I would definitely recommend it.
Certainly something lovely to treat yourself to for the upcoming spring when we´re gonna wear brighter lipsticks, so you get a nice contrast and a pearly white smile.

Have you tried this Kit before?

BLOGLOVIN | INSTAGRAM | TWITTER | PINTEREST

SHARE:

26/03/2018

3 Drugstore Concealers That Help Me Looking Wide Awake - Even When I‘m Not

3 Drugstore Concealers
No matter what day of the week it is - apart from the weekends - you´ll clearly see that I´m sleepy and want to go back into my bed. I have to face reality though and get out and get ready for the day.
To also make it look like I´m ready for that I use concealer, a lot of concealer.
For this product I absolutely love reaching for the drugstore versions, not only because I find they give the best finishes but also because I run through them so quickly, that I just couldn´t afford repurchasing a high end concealer every time.

My most frequently used drugstore concealers are the following three...
3 Drugstore Concealers

Collection Lasting Perfection

Let´s start with the one that has the highest coverage. You all probably know this concealer and have hopefully tried it yourself already. On those really rough days I will definitely reach for this concealer, whether it be to hide my dark circles or any blemishes.
This concealer comes with a wand that I use to draw a triangle shape under my eyes and then blend it in with my beauty blender. Even though it´s high coverage I don´t think it looks heavy at all nor does it feel like it. Set with a baking powder it stays in place all day, doesn´t dry my skin out and does it´s job perfectly fine. I got this like a year ago when I was in London - cause it´s not available in Germany - so I´m not sure about the colour range, but I´ve got No. 1 and it suits my skin really well.
I´ll definitely stock up on it when I´m in the UK again as it´s literally an absolute lifesaver on so many days.

Maybelline Age Rewind

After a long break I got around to buying my second tube of this absolute glorious concealer.
It has a medium coverage, but is easily buildable, while still looking very natural. Since it comes with this sponge applicator you kinda already blend it in while applying it, which I really love on those days where I´m short on time - which comes towards the end of the week when I think it´s a good idea to snooze a bit longer. I don´t know why it took me so long to repurchase it but I´m glad I eventually did as now I´m using it almost every day and just love the natural, a bit glowy finish it gives me. Maybelline recently came out with new shades for this concealer and one of them is a brightening shade, which I´m definitely going to try next.

Maybelline Fit Me

The one with the lowest coverage is my old and trust Fit Me Concealer, I´m not too sure but this might be my third tube already and definitely not my last. It´s just one of those that you can wear all year round. As it has a lower coverage it´s also pretty lightweight but you can build it up to a medium coverage. The only two things that are "bothering" me with this product are that you need to blend it in with a brush as I find it kinda loses a lot of coverage when you use a beauty blender and also the colour numbers are soo confusing. Like No. 10 is the darker yellow shade and No. 15 is the paler, pinker shade. I find that was really confusing. 
3 Drugstore Concealers

All three of them are totally worth a try, if you haven´t tried them already.

What is your favourite concealer? Do you prefer high-end or drugstore?


BLOGLOVIN | INSTAGRAM | TWITTER | PINTEREST

*this post contains affiliate links
SHARE:
Blogger Template Created by pipdig