


After saying goodbye to my lash extensions (and of course missing them to bits) I thought I´d start reaching for fake lashes for nights out as they literally make such a huge difference to my whole appearance. Well it always seemed easier watching other girls putting them on, when I did it, it felt like an impossible task.
First off I can say that it really takes some practice before you master it perfectly and have those falsies on in two minutes, but in collaboration with FalseEyelashes I´ve put together some tips that have helped me a lot:
Start Simple
Of course those long fluttery lashes are way prettier than those short natural ones but trust me, when you have no idea how to stick those lashes on or where to hold onto them with your tweezers, it makes the whole thing easier when you don´t have long lashes in your way. FalseEyelashes.co.uk is literaly the perfect shop to look through when deciding what lashes you want to start with! They have a huge selection of different brands and styles together with every additional product you need such as tweezers and glue. My personal favourite brand is KISS, they are really easy to apply and the glue that comes with the lashes is absolutey amazing - it´s really strong and so you don´t need to worry about the lashes coming off. I started with their Tulip lashes as I always found long lashes very irritating in the beginning cause I was more worried to not bend them over too much or break them. Other than that when you´re wearing falsies for the first time it´s something you have to get used to as you can lightly feel and depending on the length, you can also see them and of course you look a bit different and too long lashes could be uncomfortable and we don´t want all the work to be done for nothing cause you don´t like the way they look.
So start simple and then build it up to more dramatic lashes.

Fit Them To The Size Of Your Eyes
I think this step could easily be forgotten but most of the times the fake lashes are too long for your own eyes so basically all you have to do is put them on your lash line without the glue and see how much you can cut off. Some cut the outer part off but I actually prefer to shorten them on the inner part as I´d rather keep those longer outer lashes than the short inner ones. This step is the easiest as you can´t do much wrong, if you cut a bit too much off it´s barely visible after putting on mascara.
Cut Them In Halves
This was the tip that changed absolutely everything for me.
I never managed to make the whole lash band stick at once as I never met the middle of my eye with it so it was always too short or not right on one end. By cutting the lash band into halves it got a lot easier. After I fit the band to the size of my eye I count the points on the band and cut them through in the middle. I often also only stick on the outer part as this can give you a more cat-eye effect.
Wait For The Glue To Dry
This one is a really simple tip but so important as when you try to glue the lashes on too soon you will make an absolute mess on your eye lids and when it´s too late they won´t stick properly.
So what I do is put a fair amount of glue on the band, when it´s frehsly on it´s pure white and as soon as it gets slightly clearer and more see through I´ll stick it on. This way they will already stick but you can still move them and pull them into their right place. In the beginning I always waited exactly 30 seconds but to be honest it always depends on the glue and the amount you put on so just watch closely and you will see what I mean by getting more clearer.
Alternative you can also use black lash glue as this will blend more easily with your eyeliner, in case you´re wearing one, but I find that way it´s a bit harder to see when is the right time to put on.

Alternative you can also use black lash glue as this will blend more easily with your eyeliner, in case you´re wearing one, but I find that way it´s a bit harder to see when is the right time to put on.
Select The Right Brand For You
There are an unbelievable amount of different brands that all have gorgeous falsies to offer but still they are all slightly, whether it be in the quality or the thickness of the lash band, etc. I always thought I´d get on with the Ardell Lashes just like everyone else, but I find them so much harder to put on then compared to KISS Lashes. Not a lot drugstores sell different fake lash brands so I really recommend looking through FalseEyelashes.co.uk - I received absolute beautiful and natural lashes from Eylure which I´m really excited to try. I would have no idea where to get this brand from here in Germany, so it´s really cool that you can not only get many different things from one shop but also discover new brands and styles.
Once you get the hang of it, I promise you are going to want to wear falsies everyday haha. They make such a huge positive difference and make every makeup look a whole lot prettier.
BLOGLOVIN | INSTAGRAM | TWITTER | PINTEREST | FACEBOOK
Once you get the hang of it, I promise you are going to want to wear falsies everyday haha. They make such a huge positive difference and make every makeup look a whole lot prettier.
BLOGLOVIN | INSTAGRAM | TWITTER | PINTEREST | FACEBOOK
Post a Comment
*Post contains PR Samples

Until recently, I didn't wear jewellery at all.
Don't ask me why, somehow I didn't like it and never felt comfortable with it.
On the other girls, no matter which jewelry they wore, whether it was fine or larger statement jewelry, it always looked really beautiful - but well in my eyes not on me haha
After a while of browsing through Instagram and Pinterest, I bought some statement earrings haha. I know it's exactly the opposite of what I firstly said, but I thought Go Big or Go Home hahaha.
I always liked the idea, when you wear something simple and then just wear big earrings, but my collection of statement earrings stopped after the 2 pairs - for now, as I still very rarely wear them.
But when I came across the Instagram account of JewelryQueen I thought, ok come try it again with some decent jewellery that I can wear every day, it can't look that bad.
JewelryQueen has a lot of very nice jewellery, most of the pieces are kept rather simple, but that's very trendy anyway.
From necklaces, earrings, rings, ear cuffs, watches and now also scrunchies everything is there.
What I particularly like is that there are often new jewellery, but also that they are usually also available in gold, silver and rose gold, mega!
I was very lucky and was allowed to choose a few pieces again and again and I have to say the quality is really great! All items look exactly the same as on the pictures (which is sometimes not the case with other online shops) and as I said for the prices, I really have nothing to complain about. They are perfect for people like me who want to wear decent jewellery. In the beginning I could hardly decide what I would like to have, because I suddenly liked them all a lot and that made me want to be a little more " brave " and to add jewelry to my outfits.

By now I have a small collection of pieces of jewellery to which I really regularly reach for. As you can see, these are mostly earrings and a mega cute arm bangle.
I chose this one in pink gold and I love it so much.
It is small but fine, easy to combine with other bracelets and really fits to everything! Whether it's an elegant evening look or a very simple casual jeans and a nice top outfit, the bangle adds that extra something.
Now to my favorite earrings.
I found the Simple Studs really cool right away - I don't think it could be any more subtle. Somehow they are hardly visible, because there are really only two silver lines on the ear but nevertheless they still spice up a boring outfit somehow.
The Double Hoops on the other hand are real eye-catchers! The smaller Hoop is kept quite simple and the larger one is rather ribbed, which makes this pair look so playful but still elegant. With these pieces of jewellery you don't need much other jewellery than a cute ring or a bracelet.

My absolute favourite, which I also wear the most by far, are the Pearl Studs.
Everyone needs them, without exceptions. I don't think there is a more classic, more elegant, more timeless piece of jewellery. Just like the other earrings, they add a certain touch to any outfit, but this pair is still something very special because it is this classic piece of jewellery.
All earrings are also very comfortable to wear, I don't like it when the ears just pinch or squeeze after a while, because the quality of the earrings leaves much to be desired, but with these everything is fine. Easy to put in and put out and as I said the wearing comfort is very satisfying.
My Favourites:
Are you the more decent or the statement type when it comes to jewellery?


Who doesn´t love a heavenly smelling, unique fragrance? I definitely do and am always on the hunt for a new one I can keep sniffing, recommend to my friends and family and overall just make it my very own unique scent.
Well, I found exactly two fragrances from a brand that is quite new to the market of perfumes - Coach
You might know this brand more for their bags, or just generally their leather ware, but some time ago they launched fragrances - I can tell you one thing about them already, they are FAB!
The bottles resemble the typical design of their products, you get a really simple yet kinda classy and luxurious looking bottle - according to the motto less is more.
Formed into the glass is the Coach Logo, which I find looks really cool as you can see right away from which brand this perfume is, without it being too obvious and over the top.
Another thing that I found really cool, is that the sprayer looks exactly the same as the buckles of their bag, I really love how thoughtful and detailed even the bottles were designed.
I first got introduced to their perfumes at a Blogger event last year, and since then I haven´t used any other perfume - even though I did and still have some half used perfumes on my vanity...
Classic
"Inspired by the spontaneous energy and downtown style of New York City"
Their first fragrance was inspired by NYC, where Coach was founded, and so is also kinda something really special for them, I believe.
With the ingredients of this scent they kinda tried to hold onto their main product range - leather.
So for the base scent they choose a suede musk, don´t think that this fragrance smells a lot like that though, it does have a really light leathery scent to it, but with the Turkish Rose and Raspberry that were also added, it has a really gorgeous scent - a bit fruity, a bit rosy and a bit of leather makes a really nice mixture. I find it really comfortable to wear, as it´s not a heavy scent that will be the only thing you smell for the whole day, but it´s more like something that fades away a bit but people around you will easily be able to smell it when you move around or pass by.
This fragrance is the first one I got compliments for, and jesus did I get a lot of compliments.
I first had the 30ml bottle, before I was kindly gifted the 90ml bottle, so I gave the smaller one to my mum and she wears it daily! Same as my sister who even already purchased this perfume already.
It´s definitely a big hit in our family!
All in one, this fragrance is a timeless scent, that you can either wear in the summer or in the winter, it just fits perfectly and gives you a really unique and lovely scent.

Floral - their newest addition
Just recently they brought out the spring/summer edition fragrance and oh my god I love it!
I´m generally someone who likes sweet, feminine fragrances more than anything, and so this one was something I was really excited about as I already loved their classic fragrance so much.
I was absolutely not dissapointed!
This perfume is inspired by Coach´s signature Tea Rose collection (find here), starting from the packaging and the bottle tag with those cute little flowers on, which you can find on every single item of the said collection, to the absolute gorgeous flowery scent of this fragrance.
I find this is soo comfortable to wear, cause you know those perfumes, where you kinda always think it might smell too strong and just not nice to smell all day round - well this is definitely a scent that is easy to wear and actually stays on during the whole day!
Now that I´ve mentioned about a hundred times how good it smells, I´ll tell you what makes the perfume smells so good.
As a base they choose crystal musk, and on top sambac jasmine and pineapple sorbet.
I find it has a quite musky scent, yet is kinda sweet and fresh smelling and so is all in one a very chic and elegant feminine perfume.
I´ll surely wear it throughout the whole summer, as it just adds that special something to a cute summer outift and ambience.
I find this is soo comfortable to wear, cause you know those perfumes, where you kinda always think it might smell too strong and just not nice to smell all day round - well this is definitely a scent that is easy to wear and actually stays on during the whole day!
Now that I´ve mentioned about a hundred times how good it smells, I´ll tell you what makes the perfume smells so good.
As a base they choose crystal musk, and on top sambac jasmine and pineapple sorbet.
I find it has a quite musky scent, yet is kinda sweet and fresh smelling and so is all in one a very chic and elegant feminine perfume.
I´ll surely wear it throughout the whole summer, as it just adds that special something to a cute summer outift and ambience.

Most of the times when new perfumes are being released, there are also bodycare products coming with them - which I never really get around to trying, until now.
This shower gel was also gifted to me and it smells divine! Exactly like the their classic fragrance.
I don´t use it everyday, as I´d rather safe it for special occassions, haha.
It´s texture is not creamy at all but rather an actual gel, which has a very strong scent at first but once you wash it off again it becomes a lot lighter and so lovely! I actually doubt you´ll need to put on perfume after using this product in the shower.
Have you tried the Coach Fragrances before? What kind of perfume do you prefer to wear? Flowery, fruity or something more musky?
- This post contains PR samples -
*this post contains PR sample

Now that I´ve updated my makeup collection to spring approved products, it´s now also time to update my "accessorizes" - aka my phone.
I´m not a girl who wears a lot of accessorizes or jewellery so I kinda have to use my phone or rather the phone cases that I put on my phone to add a little something to my every day looks.
I absolutely love buying phone cases, whether it´s really simple ones, seasonal ones - especially christmas phone cases! they can´t be cheesy enough, haha - or creating personal ones for either myself or my friends - it´s just a really cool and thoughtful gift.
If you are anything like me in this point - or simply just want to redecorate your phone - I think I have just the right shop for you....

CaseApp
CaseApp is an online shop that specifies on all things about smartphone, tablets and macbook cases and skins. They offer a huge selection of cases and skins for iPhones, Samsung Galaxy, iPods, iPads and Macbooks, so I´m pretty sure almost all of us will find something fitting for their device - they even offer their designs for iPhone 3 which is very suprising but also very cool, haha.
Now to the designs, their offer of different predesigned cases is just amazing and it was soo hard for me to decide on three phone cases. I definitely wanted some that not only look cute but also kinda fit into the colour scheme of my pictures so that I could also use them as blog props.
Scrolling through their designs I found varities of marble, flower, fruits, art-y, animals and many other designs.
They do not only offer pre designed cases though, you can also design your very own phone cases and skins for your devices - and also even for your phone holder, how exciting is that!
Creating them is literally so easy aswell, all you need to do is select your device, upload a picture of your choice - or even more pictures as it´s also possible to create collages - and if you want you can also add a texts, cliparts or a background to the design.
Definitely a lot of space to let all your creativity out and create something very special and unique!
Now that you´re done with designing, there´s one last step you can decide on, do you want your case to be matte or shiny? Haha.
The design gets printed onto the case so it has a really good quality, and I´m pretty sure the print won´t rub off my phone cases really soon - which is something that happens quite often with cheaper options. Especially in the summer months when I get sweaty or oily hands.
CaseApp offered me to select three phone cases, as I thought not only I should have the chance to give my phone a little makeover, I made my mum and sister select one for each of them aswell.
In the end I went for the phone case with little plants on them, I already got a lot of compliments for it and it will definitely appear in loads of future blog posts as it fits just perfectly with my theme! My mum went for the marble design with the pink corner, which I think is really cool, simple and yet has a kinda girly touch to it with the pink detail.
My sister went for the gold rosé kinda marble design. Again really cool and so unique, like I´ve never seen a phone case like that!
Do you want to get a phone case or skin yourself now?
I also got the chance to give a lovely discount of 20% on your order with the code LAURA2018
Apply it during checkout and save yourself some pennies ;)
You can find the shop this way: https://caseapp.de/
Please make sure to show me the phone cases you get or create by tagging me on the pictures of them on Instagram! I´m really curious to see what you all selected in the end :)
BLOGLOVIN | INSTAGRAM | TWITTER | PINTEREST
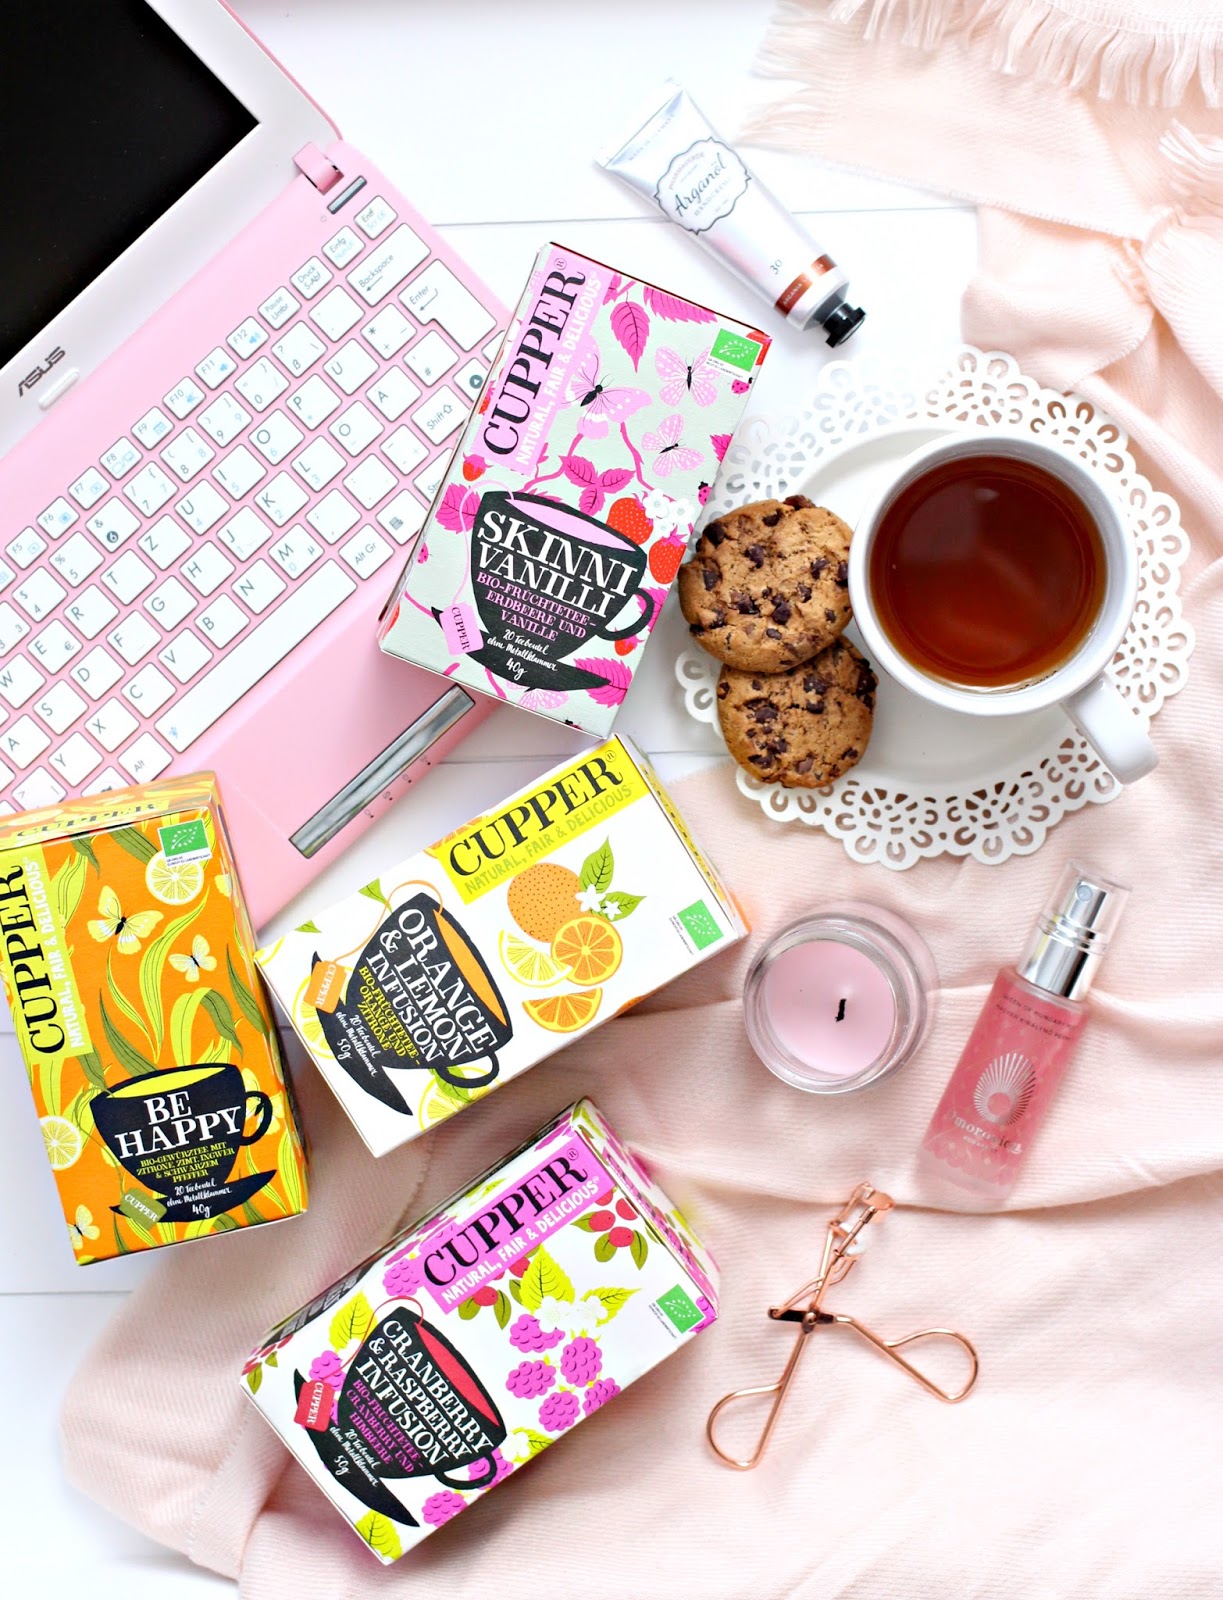

Creating good quality content not only needs a lot of inspiration and motivation but also an atmosphere where you can be productive and concentrate.
With atmosphere I don´t only mean your working place but also the things surrounding you.
When I´m writing up blog posts I often do that on my sofa or on my bed which works perfectly fine for me, the only things that keep disturbing me are little things like my phone, thirst, etc.
So, I got together with Cupper Tea to spill a few of my tips on how to create a productive atmosphere.
Shortly about the brand Cupper Teas, they are an original british tea company that was founded 1984 in Dorset - and are also UK´s first Fairtrade tea company.
What makes them so different from many other tea companies is that their tea bags are unbleached - unlike other bright white tea bags, their ones have a slight yellow-y shade to them, it doesn´t look disgusting though so don´t worry, I barely noticed the colour difference when I made my first cup.
As a tea lover, I think it´s really cool to find a tea company that not only pays attention to being fairtrade in their teas but also pays attention to little details as also being natural with their tea bags.
They sent me four packages of their tea to try, which leads me to my first tip for an productive atmosphere...
Enough Drinks & Snacks
I find myself being a lot easier able to concentrate when I´m hydrated, so before I start "working" I get myself something to drink. Water is definitely the healthiest option, but I like to go for something sweeter, like juices or during the colder months - a nice hot cup of tea.
Recently I quite enjoyed to make myself a cup of tea - preferably the Cranberry & Raspberry tea from Cupper Teas - and just let it cool off to get kind of an ice tea. Sooo refreshing and yummy!
Whatever you like to drink, make sure you have enough of it next to you - I find when I don´t have something to drink with me from the beginning I´m too lazy to get up after, haha.
Snacks are a nice addition as I sometimes just get random cravings that need to be taken care of, haha. Sometimes it´s sweets, or fruits or pastry, whatever it is I´ll most likely thank myself for thinking ahead haha.
Writing a To-Do List
I leave all the blog work until the weekend so as you can imagine there´s definitely a lot of things I have to get done when the time comes around - taking photos for several posts, for instagram, writing up posts, commenting on other blog posts, answering email, etc.
All of this can get quite overwhelming when I have to remember everything so to make things easier for myself I write up a to-do list. I just feel a lot more in peace and not as stressed when I can tick off things and also feel so happy when I can actually see what I got done that day.
I´d also like to start getting more into planners just to also be able to plan week aheads and so take the stress off worrying about not having any ideas for future blog posts
Tidy Space
When I find myself actually working at my desk I try to keep it as tidy as possible.
I absolutel hate it when my working space is full of papers and stuff as I can´t really concentrate since I keep being distracted by everything that lays around.
Of course you don´t have to put everything away from your table but you should clean it up to the point where you feel comfortable, have enough space to move around and the only thing you concentrate on is your computer. I just recently cleaned my desk at work and I felt immediately so much better and my mind wasn´t feeling as crowded as it was before.
Put Your Phone Out Of Reach
I left the most important point until the end. In order to actually get something done you have to put your phone away - atleast out of arm-reach.
Whenever I find myself back on my phone, scrolling through my Instagram feed for the hundredth time, I wonder how much I would have gotten done if I would not keep reaching for my phone.
It´s just so addictive to keep looking through social media and seeing what everyone else is up to - you might have heard of it but the Fear Of Missing Out is taking up so much of our daily life, it´s actually scary once you think more about it.
When I do put my phone away I find myself being so much more productive, so what I do to make sure I don´t actually miss out on any text messages or phone calls - as I find myself being distracted only by social media - is turn off the mute mode and put it anywhere where I could easily reach it when I get up. That way I can still check on it but don´t mindlessly reach for it and look through all the feeds.
Even though all these tips are sooo simple, I find they are the most effective.
We get distracted and overwhelmed with daily things soo easily, so it´s even more important to take over control of as much as you can and keep a clear head.
What are your tips for creating a productive atmosphere?
*this post contains PR samples
BLOGLOVIN | INSTAGRAM | TWITTER | PINTEREST
*this post contains PR sample

Long, voluminous, thick lashes are every girls dream, right?
I find whether you´re wearing eyeshadow or not, having a pretty pair of lashes on literally transforms the whole look to a completely new level!
Sure you could just use your favourite mascara to make your lashes look fabulous, but most of the time you don´t achieve the same finish when some of your lashes have fallen out or are just not as long and thick as you wish them to be.
Same happened to me. I do have quite long lashes - thanks to Revitalash - but sometimes I just have spare spaces that I wish would just dissapear.
After watching loads and loads of makeup tutorials, I thought I´d give false lashes a try myself.
The girls in the videos made the application always look soo easy but unfortunately I was struggling soo hard with them, and gave up on using false lashes shortly after... until NOW!
Ardell is using a new technology for their newest false lashes line - Magnetism.
They use really small - nearly invisible after appliying - magnet bullets. Together with all natural human hair as lashes, it will be hard to notice if you are blessed with these gorgeous lashes, or if you had a little help to look even more fab ;)
I got the chance to try the Magnetic Lashes out myself before they hit the shelves in - mark your calendar - May 2018!!
So not long to go now, yaaay.
So not long to go now, yaaay.
Ardell kindly sent me the pair "110 Double", which I find is the more natural version of their original Demi Wispies.
Included in a package are four lash strips which make up to 2 pair of lashes - you got two upper strips and two under strips. All four of the strips are pre-curved to make it a lot easier for you to fit them on your eyes.
Well now we come to the exciting part of this new release, as the name already says this new lashes line is simply applicated with magnets. So you no longer have to deal with buying new lash glue, getting the right amount on the lash strip, no more waiting until it´s dry, etc. all you do is stick both lashes together and off you go - sounds lovely right?
As you cann see every lash strip has a few magnet bullets attached to it.
I was at first a bit worried whether these magnets were strong enough to really stick together, if you can feel the magnets, also if they would kinda break my lashes while being they "stuck" between two magnets and most importantly if they keep the lashes in place throughout the day/night.
After putting them on for the first time though, I was positively suprised by how strong they stick together, yet feel totally comfortable. They don´t budge at all, I tried slightly pulling on them and they did move a bit but from themselve they don´t move at all!
Speaking of my first application, it was again a bit tricky to put them on, but a whole lot easier then normal falsies with a glue. Simply because if, e.g. they´re not close enough to your lash line you can just try again and again. With the glue I always got it stuck on my lashes and lid and messed my whole eyemakeup up - please tell me this has not only happened to me haha.
I did have to try around a bit until I found a way of applying them that was easy for me, but eventually I got the hang of it and loved them finish.
It´s not really visible that you kinda have two lash strips on one eye and also they feel just as lightweight as the normal falsies.
I did have to try around a bit until I found a way of applying them that was easy for me, but eventually I got the hang of it and loved them finish.
It´s not really visible that you kinda have two lash strips on one eye and also they feel just as lightweight as the normal falsies.
Application
To apply them the right way, you first apply a coat of mascara to your lashes.
Then you take a tweezer - preferably the Ardell Dual Lash Applicator - and hold the upper lash strip in place on top of your lashes as close to your lash line as possible.
Then you take the under lash strip and move it towards the other strip so that your actual lashes are right between them.
And Ta-Daa you´re done and good to go.
Be careful when you want to take them off though as to not pull out your own lashes...
I always grip them between two fingers and move them in different direction as to push the magnets apart. For storing you just put them back into their box and press the sides onto the sticky patches.
Just to make sure you have a curved lash strip for the next application.
When you´re planning to try them out yourself, take care of what size you pick as there are two.
The bigger size has 4 magnet bullets and the smaller size has only 3 bullets.
You´re not able to trim so you might want to decided on the size before buying them haha.
I got the smaller size with 3 bullets and they fit perfectly - I always had to cut off a good amount off the Demi Wispies.
They´ll cost around 14,99€ - sounds a bit expensive but you have to keep in mind that you can reuse them really often, so definitely worth the investion.
Of course Ardell doesn´t only offer the 110´s but there will be also Double Wispies, Double Demi Wispies, Accents 001 & 002. So there´s definitely a pair for everyone.
I feel like the Accents could be really interesting to try next for me!
End of the story is that I feel like this is one of the best beauty inventions ever!
It´s a great product whether for falsie beginners as you´ve got loads of trys without destroying them, but also for pros as it´s a fun thing to try out and might save you a lot of time during styling.
*this post contains PR sample
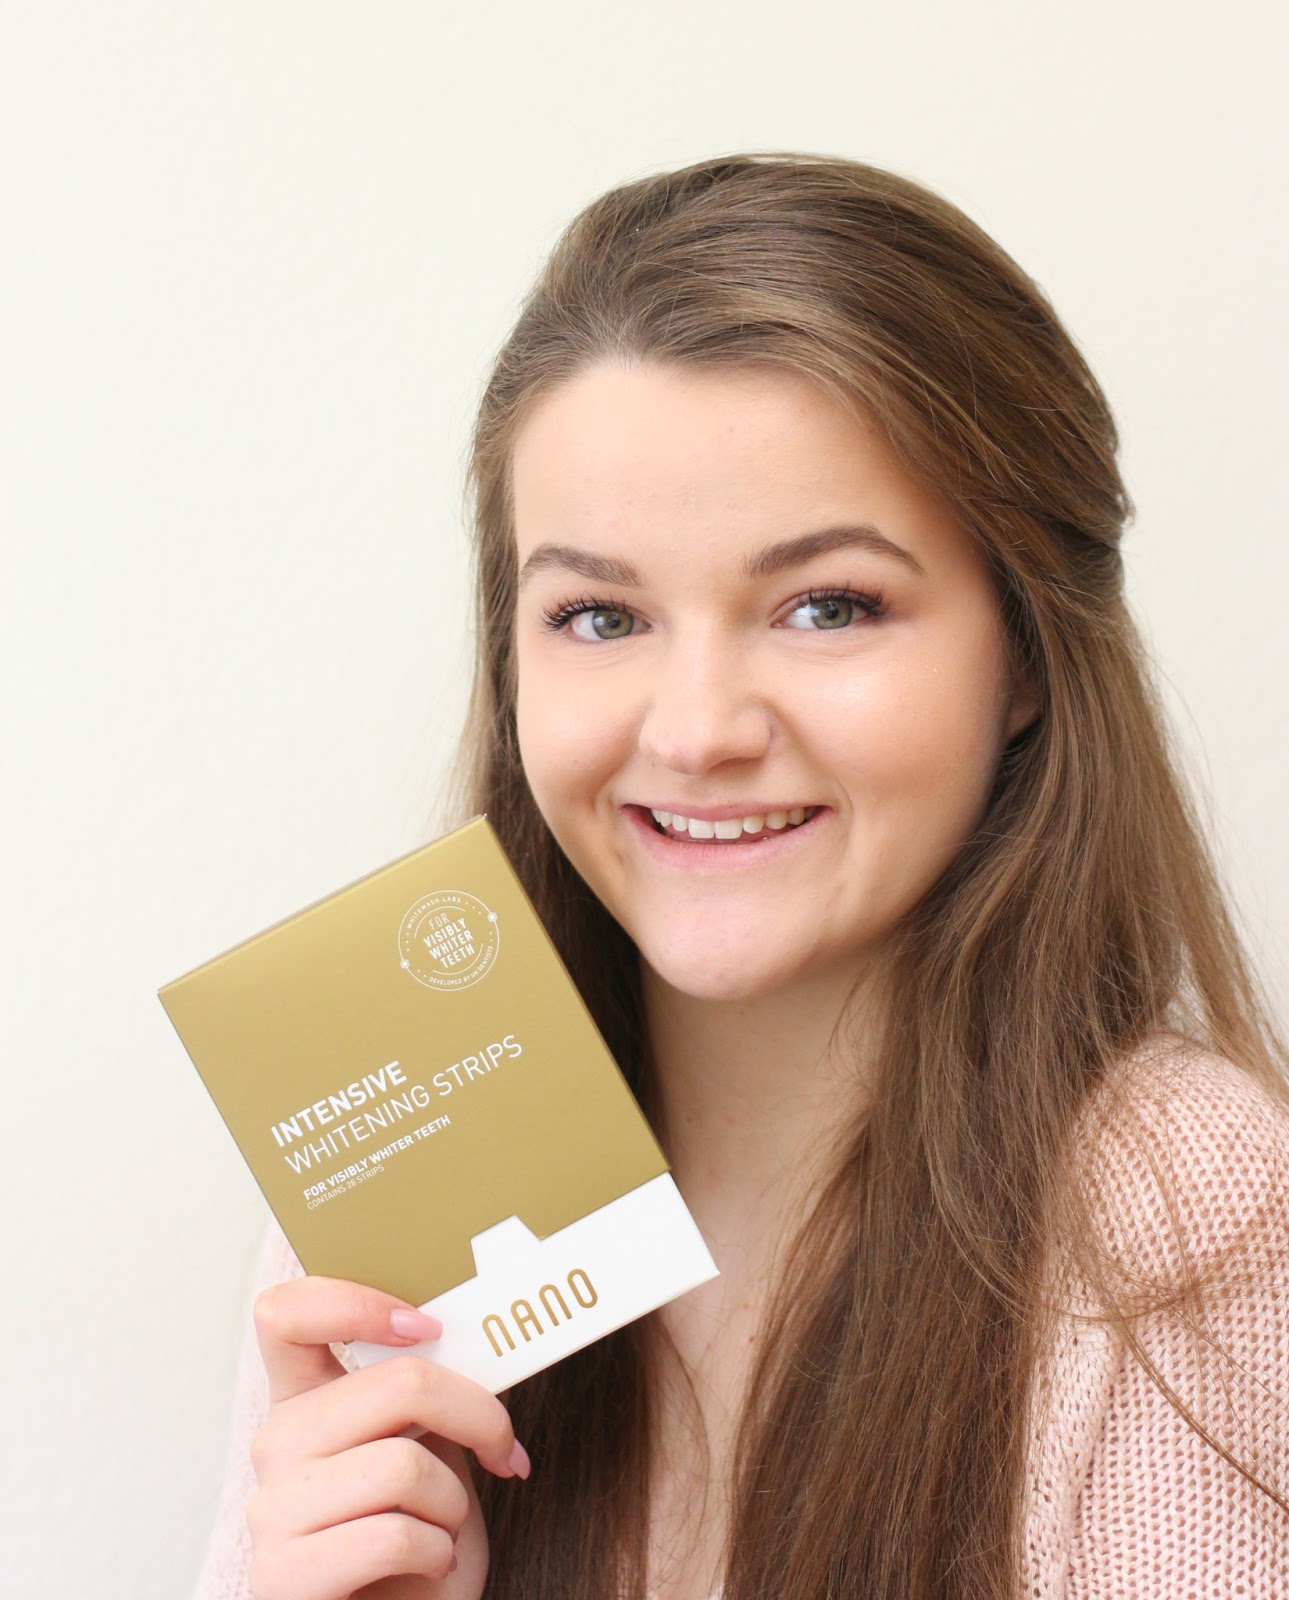
Whitening your teeth in the comfort of your own home, sounds good? Then I think I have the perfect product for you
So some time ago I was kindly sent this Intensive Whitening Strips Kit from White Wash Laboratories Nano. As I was always debating whether it´s worth to get my teeth bleached and not being sure if it would look strange and unnatural, I was very excited to try these strips as they promised to give me naturally white teeth in a matter of two weeks.
This kit contains 14 packs with 2 strips per pack - so 28 strips in total. I sadly forgot to take pictures of the actual strips so sorry for that, but they are simply clear gummy strips stick to a little plastic square. The side of the strips that is attached to the plastic thing contains the gel that will whiten your teeth. All you do then, is pull the longer strip of and put it onto your upper teeth row, the shorter strip is then for your lower teeth.
They are meant to have a mint flavour but I found they had a really weird taste to them.
Kinda hard to describe, as it wasn´t really a plastic taste but just weird, after getting the gel on my tongue accidentally - don´t ask me how I managed to do that - I was trying really hard as to not make that happen again. Bu don´t worry about having this weird taste in your mouth for the whole hour, I really only tasted it when I got it on my tongue, other than that it´s really comfortable to wear and didn´t cause any discomfort or has given me the thought of having to remove it immediately.

So after getting over the taste trouble, I put the strips on and put my timer on for an hour.
Most of the times I tried to use this as late as possible as you shouldn´t drink or eat anything while using them - you couldn´t drink anything with them in even if you really wanted to, haha, so I put them on at like 10pm and after removing the strips I went straight to bed.
I sadly have to say that I did have trouble with putting them on sometimes. As I found when my teeth were wet, the strips just didn´t want to stay in place, especially not the stripe on my lower teeth.
It sometimes moved around a bit, but I figured out that it´s better to put them on after swallowing and drying of my fingers - just a little tip from my experience here to save you nerves haha.
Speaking of removing the strips, after wearing them for an hour they stuck really strongly on my teeth. I found I had to get a tight grip on them to be able to remove them. I flossed the leftovers of the gel with water and my toothbrush. They kinda felt even cleaner, than after brushing them.

Together with the stripes I was also kindly sent this three pack of products that should be used together with the strips in order to really get the full effect.
It contains a toothpaste, a mouth wash and floss.
The toothpaste had a different consistency to the normal toothpaste you get at any drugstore. It was a lot creamier, was very minty and kinda gave me an even fresher and cleaner feeling than an "average" toothpaste. The mouthwash had a very similar taste and effect than the toothpaste and the floss is really awesome. That´s a weird thing to say but up to now I still use it everyday as I find it cleans the space between my teeth a lot better and more gentle than a normal floss.
Why? Well it´s kinda wider and so you really get everything out.
After the two weeks were over I did notice a difference - which was a positive suprise as even though it did sounded very promising, I was sceptical if it would really give me a visible result.
To be honest even after a few days I could already see a really small difference but after the two weeks I was very happy with how my teeth looked.
Before they were kinda stained - you know from drinking tea, coffee, etc. - and after they were just brighter. I´m sooo happy with this product and since you can use it so easily and comfortable at home I would definitely recommend it.
Certainly something lovely to treat yourself to for the upcoming spring when we´re gonna wear brighter lipsticks, so you get a nice contrast and a pearly white smile.
Have you tried this Kit before?
Shop the Teeth Whitening Strips here: https://whitewashnano.co.uk/product/nano-intensive-teeth-whitening-strips/
BLOGLOVIN | INSTAGRAM | TWITTER | PINTEREST
*Post contains PR sample

The skincare product I love to use the most are face masks.
There are endlessly different ones on the market, all with a different purpose, on a huge price range, several ingredients, smells and looks. I have tried myself to a few ones, and one kind of face mask has caught my attention in particular. Charcoal/Mud Masks.
I was recently informed by a, for me, unknown brand called Fresher Me and I was offered to review their Mud Mask.
I was very curious as this face mask wasn´t particular made for cleaning your skin, but to nourish and moisturizer it, and since I´ve been suffering with the driest skin at the moment, I had high hopes that this mud mask could help me.

This mud mask consists of, natural Dead Sea Mud, Vitamin Pro 5b, Shea Butter, Coconut Oil, Apricot Kernel and Aloe Vera. They all have the aim to fight blemishes, give your complexion enough hydration and revitalise it. Especially the Dead Sea Mud, the main ingredient, is supposed to actively pull toxins out of your skin while the Vitamin Pro 5b is there for pulling water out of the air to give you a look of instant refreshment.
I find it sounds really interesting, as I never heard of a mask that pulls something from your surrounding in advance for your skin!
When I opened the tub I was firstly suprised by the strong scent! To me it smelled like modelling clay and so I was scared that it´s not bearable to have it under my nose for 10 minutes straight. I was luckily wrong as the smell goes away completely once you´ve put it on your skin. Then I also thought the mask would be really heavy and creamy, like the Origins Charcoal Mask, but it´s nothing like that. The formular is really wet but not watery, like it´s a bit thicker than a moisturizer. When I applied it, it felt sooo comfortable and after a while I forgot that I even got it on.
On the product itself it stays that the mask doesn´t dry and stays wet, but I do find tha after a while it gets stiffer, but not weird at all, like you´re still able to move your face underneath, but you can also feel that something has happened to your skin.
To get it off without any problems, I have used a warm wash cloth.
Then after it was off I was left with soft, moisturized skin. Absolutely amazing, as I have definitely felt a difference. This product also promises an instant effect after the first use, I find the effect isn´t huge, but little blemishes have surely faded and my skin
wasn´t dehydrated anymore.
I would say the Fresher Me Mud Mask is worth a try, if you have dry skin with a few little blemishes like mine and could need something to treat yourself to :)
Buy it here for 16,99£

Hello everyone!
My name is Molly and I run a little blog called Molly Daydreams.
Today I'm going to be guest posting and talking you through a few of the hottest products for Summer 2016.
Della from DellaLovesNutella gladly sent me over this post of hers to use as a guest post for during my holidays :)
I´m really happy about it and hope you like it as much as I did!
All her links can be found at the very end of this post :)

Well hello to you my reader chums!
Sea salt hair, blue skies and forever memories, summer has to be my favourite season. With the care free attitude and endless adventures, makeup takes a back step. I use the warmer months to allow my skin to breathe, wearing lighter coverage, and glowy highlight, leaving emphasis on the lips.
Caking up your face with makeup is the last thing you need in summer when the heat is at its highest. With the increase of sweating, a higher coverage of makeup will clog up your pores, making a break out more likely – not something you want when taking those important summer holiday snaps. It’s time then to pucker up, go bold and put your statement lips on show! Natural skin, a couple of coats of mascara and striking orange lips are my favourite look on a summers day.
From bold oranges to your typical nude, I vary it up throughout this season; here are my top options:

Mac’s Lady Danger (21€)
Orange lip lovers, this is a staple you need in your life especially in the summer time! If you’re heading to a BBQ, party or evening affair, the pop of colour will complete any time of outfit. Out of all Mac’s formulations, I find the matte ones to be my favourites, seeing me through every season. With long lasting power, a strong pigment of colour and opaque finish, what’s not to love? ‘Lady Danger’ I’d describe as a bright orangey-red, the fiery shade that screams fun. It’s truly versatile and I can wear it for a variety of occasions, yet summer time is the favourite period to pop it on.

Revlon’s matte balm in ‘Audacious’ (11€)
Bronzy tans, dewy skin and a lick of mascara, this lip product is one that completes the perfect natural summer look. ‘Audacious’ is a luminous orange (not as scary as you think), brighter than ‘Lady Danger and suits slightly warmer skin tones. I find this works with my complexion best on holiday when I’ve achieved a bit of a tan and my skin has that ‘summer glow’. The formulation is incredible, despite the ‘matte status’, feeling completely creamy upon application and doesn’t leave the lips dry. Holding a peppermint scent, application is soft and the product settles on the lips like nothing has been applied. The lasting power is faultless, sticking to the lips through drinking and eating – a beautiful statement colour you need this summer.

Topshop’s ‘Rio Rio’ Lipstick (10€)
A dupe to ‘Lady Danger’, the Topshop lipstick in ‘Rio Rio’ is a top summery shade. In comparison, wearing power isn’t as long, however I find this lipstick to be more moisturising on the lips with a slight glean over the matte finish. The pigment is a tad orangeier and its formulation is velvety when applied; a staple orange shade to suit any skin tone.

NYX´s Soft Matte Lip Cream in ‘Stockholm’ (7€)
After jumping on the Nyx matte lipstick hype, I’ve fallen in love with the nude shade ‘Stockholm’, an everyday colour which matches with an array of looks. On days where I didn’t want to go too dramatic or bold with my lip options, I’ve opted for this nude choice. It gives an extra bit of warmth to the makeup look without looking too over the top for a natural face. The colour I would describe as a brown toned, dusky pink and the consistency applies buttery, yet sets matte. When the product has dried, the finish is completely matte but again like the other lipsticks I’ve mentioned aren’t drying on the lips. I’m truly impressed by the wear, formulation and overall colour pay off – a definite must have.
Nivea lip balm (2€)
Last but not least is a simple clear lip balm. When the warmer months hit, moisturising is essential even on your lips. I always carry around a lip balm, in particular this Nivea option because one it holds a sweet, fresh scent, two hydrates my lips and also gives the loveliest clear sheen upon application. Nivea products are the best at summer time because the scent is completely clean, nothing too sickly in the beaming heat.
I hope you enjoyed my top summer lips products post! What’s your go to lipstick?
Thank you for reading <3 font="">
Della´s Blog | Bloglovin | Instagram | Twitter | Tumblr

Another lady that I´m really excited to have on my blog is Caroline from Iridescentplaces!
I absolutely love her blog and it´s definitely worth a follow so don´t miss out :)
Choosing a blush for Summer is definitely one of the hardest tasks for me. I'm always looking for a shade that compliments my skin tone and one that actually stays on in the heat. This means I tend to go for very pink/peach shaded blushers and I've got three which are a must to have in your collection!
This time the lovely Beth from Polished Couture was kindly enough to guest post on my blog while I´m away in the sun :)
I really hope you enjoy reading this post and as always check out her social media and blog below! Xx

Could this be the easiest Liner I've tried? Lancome's new release from the Grandiose collection has us all 'flicking'...


This little gem arrived in my post about a month ago, I had no idea what I was receiving but it was such a surprise to see their newest eyeliner. With smudge-proof and long wear abilities, I was intrigued to see how this would match up with other liners on the market.
Not gonna lie, it was years ago since the last time I'd used liquid eyeliner. I just find them very temperamental and always opt for more gel (Benefit) or felt (S&G) liner for an easy application. Liquid liners tend to take longer to dry, easily smudge and don't seem to give the desired winged effect. However...
The Lancome Grandiose Liner has an innovative pivot liner and ibendable wand, this is such a clever product! The liner is flexible and bends to different angles and allows you to create a line right to the root. With the matte finish, it dries really quick and lasts ALL day and I mean alllll day.
Some liners you need to touch up through the day to keep it black but this 01 - Noir Mirifique shade is perfect.


As you can see, this liner gives the perfect precise eyeline with the thin tip. The matte finish gives a highly pigmented formula but there is a little downfall to this magnificent product.
For £23 you only get a little amount of product and after a months use, I'm finding myself dipping into the pot more to get the liquid. Just like high-end mascaras, this product seems to dry up pretty quick. It's still giving the same finished look from the first application to say 10 applications later, but in terms of long-lasting - you may find you'd have to purchase more of this than other liners.
Hands up, it's definitely one of the best liners I've tried to date and I've found it one of the easiest too. Would I purchase this again? Maybe as a splurge, but next time use this on more special occasions rather than a daily wear liner - it would run out too quick and that's just expensive.

Thank you Laura for letting guest post while your away!
Have you tried this liner? Would you?
Beth´s Blog | Bloglovin | Instagram | Twitter | Facebook
Subscribe to:
Posts (Atom)